Working with NetSuite via API: From Credentials to CRUD
NetSuite is one of the most powerful (and complex) systems accountants work with. Most interactions happen through the UI: saved searches, CSV imports, manual entries.
But one of the reasons virtually everything integrates with NetSuite is that most of its core tables and records are accessible through APIs.
Once you connect to it programmatically, you unlock:
- Automated data pulls
- Programmatic journal entries
- Controlled updates to records
- Repeatable, auditable workflows
In this post, we’ll focus on two things:
- Obtaining NetSuite API credentials (the hard part)
- Understanding the basic things you can do with the NetSuite API
This is not meant to be exhaustive — it’s meant to get you unblocked.
1. Obtaining NetSuite API Credentials
NetSuite authentication is notoriously confusing the first time you do it. Fortunately, there’s an excellent walkthrough that I strongly recommend watching end-to-end:
The video is detailed and accurate. Below is a concise summary of the steps so you can follow along and sanity-check your setup. This assumes you have Admin access, and—as always—I strongly recommend testing everything in a Sandbox before deploying to Production.
Step 1: Create an Integration Record
- Navigate to:
Setup → Integration → Manage Integrations → New - Give the integration a name
- Example:
Rest Web Services
- Example:
- Enable:
- ✅ Token-based Authentication
- Disable:
- ❌ TBA: Authorization Flow
- ❌ OAuth 2.0 section
- Save the integration
- Immediately copy the credentials (this is the only time they’re visible):
- Consumer Key / Client ID
- Consumer Secret / Client Secret
Step 2: Create an Access Token
- Navigate to:
Home → Manage Access Tokens - Select New
- Under Application Name, select the integration you just created
(e.g.Rest Web Services) - Accept the suggested token name or rename it
- Save
- Copy:
- Token ID
- Token Secret
Step 3: Identify Your Account / Realm Information
You’ll also need two identifiers specific to your NetSuite account.
- Navigate to:
Setup → Company → Company Information - Find the field Account ID. This value is your Realm ID.
Realm ID vs Company ID
NetSuite uses two closely related identifiers that are easy to confuse:
- Realm ID → used for authentication
- Company ID → used in API URLs
They represent the same account, just formatted differently.
Example (Sandbox):
Realm ID: 9999999_SB1
Company ID: 9999999-sb1
How to convert Realm ID → Company ID:
- Replace
_with- - Convert all letters to lowercase
That’s it.
This small formatting difference is important — using the wrong one in an API call will result in authentication or routing errors.
Step 4: Store Everything Safely in a .env File
Do not hardcode credentials in your code.
Add them to your .env file:
NS_SANDBOX_CLIENT_KEY=your_client_key
NS_SANDBOX_CLIENT_SECRET=your_client_secret
NS_SANDBOX_TOKEN_ID=your_token_id
NS_SANDBOX_TOKEN_SECRET=your_token_secret
NS_SANDBOX_COMPANY_ID=9999999-sb1
NS_SANDBOX_REALM_ID=9999999_SB1
From here, you can load them using load_dotenv, just like we covered in this post.
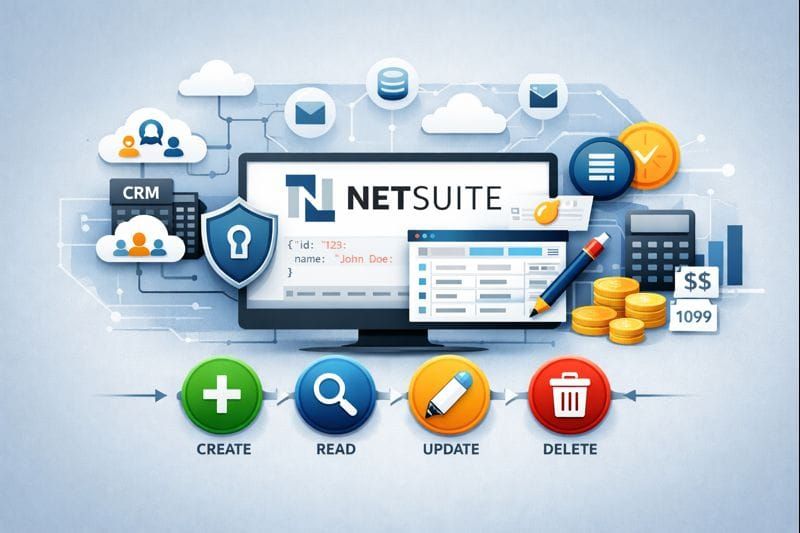
2. Using the NetSuite API: Core Capabilities (With Code)
Once authentication is set up, NetSuite behaves like any other modern API. At a high level, it supports four fundamental actions—Create, Read, Update, and Delete (CRUD)—on its records.
These operations are the building blocks of almost every automation. To make this concrete, we’ll walk through a simple example that creates, retrieves, updates, and deletes a customer record. The full, runnable code for this example is available here.
Authentication (Once Per Session)
The first step is to create an authenticated OAuth1 session. As a reminder, your credentials should be loaded from environment variables and never hardcoded.
netsuite_auth = OAuth1(
    client_key=NS_CLIENT_KEY,
    client_secret=NS_CLIENT_SECRET,
    resource_owner_key=NS_TOKEN_ID,
    resource_owner_secret=NS_TOKEN_SECRET,
    signature_method='HMAC-SHA256',
    signature_type='AUTH_HEADER',
    realm=NS_REALM_ID
)
This netsuite_auth object is reused across all API calls.
Creating Records (CREATE)
Creating records programmatically is where APIs move from reporting into execution. Instead of exporting data and manually uploading it, your script can create records directly in NetSuite.
Step 1: Specify the Payload
The first step is to define the payload — a dictionary that contains the fields NetSuite requires to create the record.
At a minimum, you must include all required fields for that record type. For customers, one of those required fields is an associated subsidiary.
payload = {
    "companyName": "API Test Customer",
    "subsidiary": {"id": "1"}
}
A few important things to note:
- Field names must match NetSuite’s API field names (not always the UI labels)
- Required fields vary by record type
- Missing required fields will cause the API call to fail
When in doubt, start with the smallest payload that works and expand from there.
Step 2: Create the Record
Once the payload is defined, you send it to NetSuite using the create_netsuite_record helper function, which issues a POST request to the appropriate endpoint behind the scenes.
created = create_netsuite_record(
    netsuite_auth,
    "customer",
    payload
)
If the request succeeds:
- The record is created in NetSuite immediately
- No UI interaction is required
- NetSuite returns a response with metadata about the new record
What You Get Back
The response includes the internal ID of the newly created record: created["id"]
This ID is critical because it allows you to:
- Update the record later
- Delete it (typically in sandbox environments)
- Reference it from other records or workflows
Retrieving Records (READ)
Retrieving records from NetSuite typically happens in two steps.
This is an important pattern to understand, because NetSuite often separates:
- Listing records (lightweight, IDs only)
- Fetching record details (full payload)
Step 1: Retrieve Record IDs
The first step is to fetch a list of records of a given type. In this example, we retrieve all customer records, but only receive basic metadata (including internal IDs).
# Fetch all customer record IDs
customer_ids = fetch_all_netsuite_records(
    netsuite_auth,
    endpoint="customer"
)
At this point, customer_ids is a list of dictionaries that looks conceptually like this:
[
    {"id": "123"},
    {"id": "456"},
    {"id": "789"},
    ...
]
This step is fast and lightweight, and it gives you the identifiers you’ll need for more detailed queries.
Step 2: Fetch Full Record Details
Once you have a record ID, you can retrieve the full details for that specific record.
For example, to fetch the first customer in the list:
# Obtain the first customer ID
customer_id = customer_ids[0]["id"]

# Fetch full record details
record = fetch_record_by_id(
    netsuite_auth,
    "customer",
    customer_id
)
The record variable now contains all the fields NetSuite exposes for that customer record.
Why Fetch the Full Record
The purpose of fetching a record by ID is to see all of the fields NetSuite exposes for that record type.
When you retrieve a full customer record, you can:
- See which fields exist and how they’re named in the API
- Inspect current values before making changes
This step is especially important when you’re:
- Learning a new record type
- Building or testing an automation
- Debugging failed create or update calls
In practice, fetching a full record is how you move from “I know the record exists” to “I understand the structure of this record.”
Updating Records (UPDATE)
Updating records allows you to modify existing data in NetSuite in a controlled and repeatable way. In most workflows, updates are performed only after you’ve inspected the current state of a record.
In this example, we’ll update the customer record we created earlier.
Step 1: Identify the Record ID
To update a record, you must first know its internal ID.
In this case, we reuse the ID returned when the customer record was created: record_id_to_update = created["id"]
This ensures we’re modifying the exact record we expect — not relying on names or searches.
Step 2: Prepare the Update Payload
Next, define a payload containing only the fields you want to change.
Here, we update the externalId field:
update_payload = {
    "externalId": "external-id-updated-via-api"
}
A few things to note:
- You only include fields that need to be updated
- Field names must match NetSuite’s API field names
- Other fields remain unchanged
This keeps updates minimal and predictable.
Step 3: Update the Record
With the record ID and payload ready, send the update request.
In the notebook, this is handled by a helper function that issues a PATCH request under the hood:
result = update_netsuite_record(
    netsuite_auth,
    "customer",
    record_id_to_update,
    update_payload
)
If the call succeeds, the record is updated in place in NetSuite.
Deleting Records (DELETE)
Deleting records via the API is supported and demonstrated in the notebook, but it should be used responsably and typically only in sandbox environments.
This operation is most useful for:
- Cleaning up test data
- Resetting experiments
- Verifying end-to-end automation logic
Step 1: Identify the Record ID
As with updates, deleting a record requires the internal ID of the record.
In this example, we reuse the ID of the customer record created earlier: record_id_to_delete = created["id"]
This ensures we are deleting the exact record created during the test.
Step 2: Delete the Record
With the record ID identified, you can issue the delete request.
In the notebook, this is handled by a helper function that sends a DELETE request to the appropriate NetSuite endpoint:
delete_netsuite_record(
    netsuite_auth,
    "customer",
    record_id_to_delete
)
If the call succeeds, the record is immediately removed from NetSuite.
Important Considerations
- Deletion permissions are often restricted in production
- Deleted records cannot always be recovered
- Most accounting automations focus on read, create, and update rather than delete
That said, understanding how deletion works is important for building and testing reliable automations safely.
Closing Thoughts
Everything shown here is technically possible in the NetSuite UI. You can create customers, update records, and even delete them manually.
The difference is scale.
APIs let you combine these actions, loop through thousands of records instead of one at a time, and drive NetSuite with data from other systems.
That’s where the power comes from.
With the same building blocks, you can for example:
- Create or update customers directly from your CRM
- Sync addresses and contact details in bulk
- Create journal entries from non-integrated systems like payroll
- Enrich vendor records for accurate 1099 reporting
Instead of clicking through screens, your code applies the same logic consistently, every time.
That’s why APIs sit at the center of modern accounting automation.