Setting Up Your Coding Environment

VS Code vs Cursor, Jupyter Notebooks, and Poetry for Dependencies
Introduction
Most accountants live in Excel. It’s our natural habitat: rows, columns, formulas, and pivot tables everywhere. But once you start coding, the landscape looks different — editors, notebooks, dependencies, environments, and a whole new set of tools.
The good news? Setting up a proper coding environment is much easier than it sounds. And once it’s done, you’ll work faster, cleaner, and with far fewer headaches.
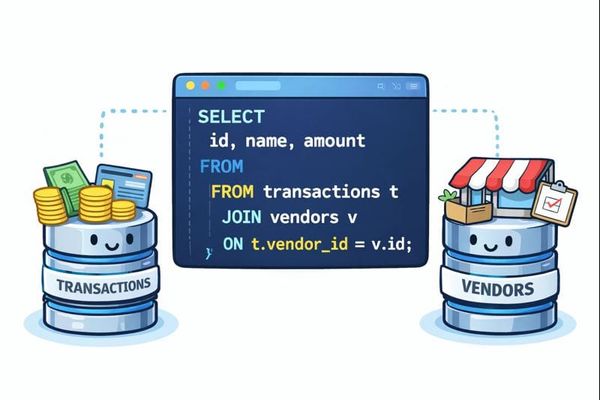
In this post, I’ll walk through a simple, practical setup for accountants who want to code — whether that means automating journal entries, pulling data from APIs, or replacing fragile spreadsheets with something more robust.
We’ll cover:
- Installing tools with Homebrew
- Choosing your editor: VS Code vs Cursor
- Using Jupyter Notebooks for exploration and documentation
- Managing dependencies with Poetry (optional)
- A quick intro to Cursor, cloud code agents, and “vibe coding.”
1. Homebrew: Your Installation Superpower
Think of Homebrew as an app store for developers. Instead of downloading installers, clicking through prompts, and hoping nothing breaks, you install tools with a single command.
If you’re on a Mac, Homebrew is the easiest way to get started.
Install Homebrew
Open Terminal and run:
/bin/bash -c "$(curl -fsSL https://raw.githubusercontent.com/Homebrew/install/HEAD/install.sh)"
Install Python (latest stable)
brew install python
Install Git (version control)
brew install git
Once Homebrew is installed, everything else becomes straightforward.
2. Installing VS Code and Cursor
Your editor is where you’ll spend most of your time. Think of it as your Excel workbook on steroids — it’s where you write, organize, and run your code.
Option 1: Install via Homebrew (recommended)
# Install Visual Studio Code
brew install --cask visual-studio-code

# Install Cursor
brew install --cask cursor
Both apps will appear in your Applications folder.
Option 2: Download directly
- VS Code: https://code.visualstudio.com
- Cursor: https://cursor.sh
VS Code: Flexible, Powerful, Industry Standard
VS Code is free, widely used, and extremely powerful.
First-time setup tips:
- Install the Python extension
- Install the Jupyter extension if you plan to use notebooks
- Open the integrated terminal with `Ctrl + `` (backtick)
AI in VS Code: GitHub Copilot
VS Code doesn’t include AI autocomplete by default. The trick is to:
- Sign up for a GitHub Copilot subscription
- Log into your GitHub account inside VS Code
- Enable Copilot
Once connected, Copilot will:
- Autocomplete functions
- Suggest entire blocks of code
- Help explain unfamiliar syntax
💡 Think of Copilot as Excel’s formula autocomplete — but for Python.
Cursor: AI-First Coding
Cursor is built from the ground up with AI in mind.
- AI autocomplete is built in
- You can ask it to explain, refactor, or extend code
- Some features are free to try
- Full access requires a paid subscription
You simply sign in with GitHub or Google and start coding.
💡 Cursor feels like coding with a smart assistant who finishes your sentences and polishes your work. Honestly, you won’t believe how good this is — it’s totally worth the 10 bucks a month.
If you’re new to coding, Cursor can significantly flatten the learning curve.
3. Jupyter Notebooks: Your Interactive Sandbox
If VS Code or Cursor is your ERP, Jupyter Notebooks are your scratchpad.
Notebooks let you:
- Run code line by line
- See results immediately
- Mix code with explanations
Accountants tend to love notebooks because they feel familiar — like Excel, but programmable.
Using Jupyter in VS Code or Cursor (Recommended)
You don’t need to install Jupyter separately from the terminal.
Both VS Code and Cursor support notebooks directly through extensions:
- In VS Code:
- Install the Jupyter extension
- Open or create a file ending in
.ipynb - Run cells directly inside the editor
- In Cursor:
- Jupyter notebook support is built in
- Just create a new
.ipynbfile and start running cells - AI features work inside notebooks as well
Behind the scenes, your editor will handle the setup for you.
When to Use Notebooks
Use notebooks when you want to:
- Prototype depreciation or amortization schedules
- Test reconciliation logic
- Explore data before turning it into a script
- Document assumptions and calculations alongside results
They’re especially useful when sharing work with teammates or auditors, because the logic and outputs live in the same place.
💡 Pro tip: If you want a quick feel for what working with Jupyter Notebooks is like, try Google Colab. It gives you cloud-based notebooks that are ready to use—no setup required.
4. Poetry: Managing Dependencies and Environments (optional)
Here’s the part that scares most people — but it shouldn’t.
An easy analogy:
- Dependencies = Excel add-ins
- Environment = the version of Excel you’re running
Without management, you get “it works on my machine” problems.
Poetry solves this cleanly.
Install Poetry
brew install poetry
Create a new project
mkdir finance-project
cd finance-project
poetry init
Add dependencies
poetry add pandas openpyxl
Run your script
poetry run python your_script.py
Poetry creates isolated environments and tracks everything in pyproject.toml, making your work:
- Reproducible
- Shareable
- Auditor-friendly
Future-you (and your auditors) will thank you.
5. Cursor, Cloud Code Agents, and “Vibe Coding”
One last concept worth mentioning (without going too deep) is cloud code agents.
In practice, if you’re using Cursor, you’re already using an agent.
Cursor’s AI isn’t just autocomplete — it has awareness of your project and can help you:
- Generate new files
- Refactor existing code
- Explain what a script is doing
- Work across multiple files at once
This is what people loosely refer to as coding with an agent.
Claude Code in Cursor
If you want even stronger reasoning, you can add Claude Code directly in Cursor.
Installing it is simple:
- Open Cursor
- Go to Extensions
- Search for Claude Code
- Install and enable it
Cloud code agents (including Claude Code) require a paid Cursor membership, though some limited functionality may be available to try for free.
Once enabled, writing code becomes much more conversational. You describe what you want to build, review the output, and guide it as needed. Some people call this “vibe coding.”
💡 For accountants, this is huge: you focus on business logic and validation, not syntax.
This topic deserves its own post, so we’ll come back to it later.
Conclusion
Setting up your coding environment is like implementing a new accounting system. There’s a small upfront investment, but once it’s done, everything else becomes easier.
With:
- Homebrew for installs
- VS Code or Cursor for editing
- Jupyter for exploration
- Poetry for clean environments
…you’re ready to build real, reliable tools — not just scripts that live on your laptop.
Disclaimer
Parts of this article were drafted with the assistance of AI to improve clarity and flow. All technical steps, opinions, and accounting perspectives were reviewed and curated by me.